月度归档:2022年01月

完整的搭建Subconverter前端,后端的过程 2022-1-23

本次环境,使用美国的VPS,配置为1C 1GB 15GB-SSD 500Mbps,操作系统为Ubuntu 20.04 LTS

第一章 安装更新

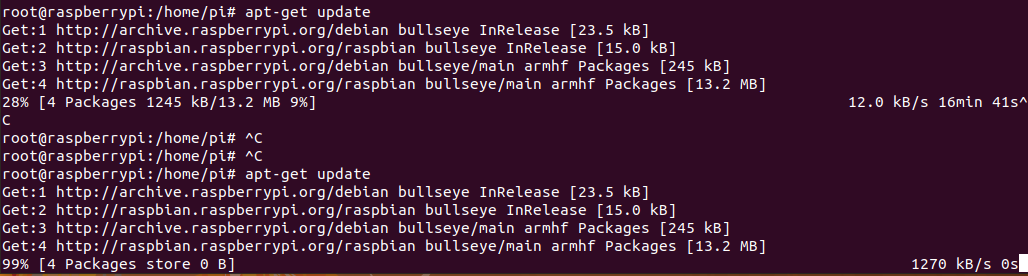
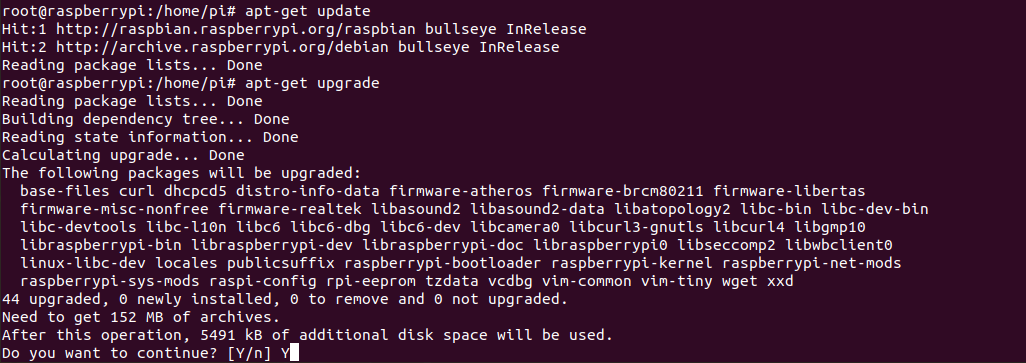
root@server:~# apt-get update

第二章 配置nginx

root@server:~# apt-get install nginx

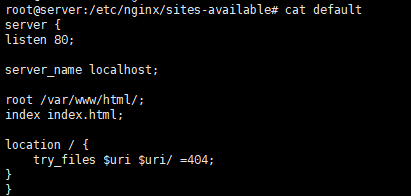
修改Nginx的配置文件,我这里直接用的 /etc/nginx/sites-available/default 文件修改的

root@server: cat /etc/nginx/sites-available/default 
server {
listen 80;

server_name localhost;

root /var/www/html/;
index index.html;

location / {
    try_files $uri $uri/ =404;
}
}

第三章 配置Subconverter后端

参考 https://dasmz.com/?p=1169

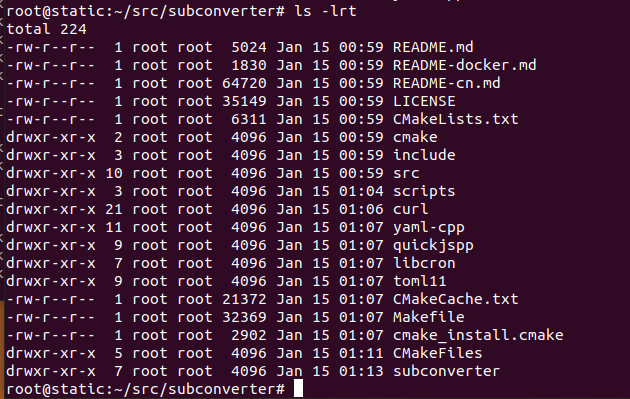
root@server:~# mkdir ./subc
root@server:~# cd subc
root@server:~# wget https://github.com/tindy2013/subconverter/releases/download/v0.7.1/subconverter_linux64.tar.gz

root@server:~# tar -zxvf subconverter_linux64.tar.gz
root@server:~# cd subconverter

// 常驻后台,启动服务
root@server:~# nohup ./subconverter &

root@server:~# ss -tnl | grep 25500
// 能看到25500的端口监听就对了

root@server:~#
// 服务器上,这个正常进程在,就可以了

第四章 配置Subconverter前端

root@server:~# apt install -y curl wget sudo nodejs npm git
root@server:~# nodejs -v
v10.19.0
root@server:~# npm install -g yarn
root@server:~# yarn --version
1.22.17
root@server:~#
root@server:~# cd subc
root@server:~/subc# ls
subconverter
root@server:~/subc# git clone https://github.com/CareyWang/sub-web.git --depth=1
Cloning into 'sub-web'…
remote: Enumerating objects: 72, done.
remote: Counting objects: 100% (72/72), done.
remote: Compressing objects: 100% (59/59), done.
remote: Total 72 (delta 0), reused 57 (delta 0), pack-reused 0
Unpacking objects: 100% (72/72), 267.15 KiB | 3.51 MiB/s, done.
root@server:~/subc# cd sub-web/
root@server:~/subc/sub-web# yarn install
yarn install v1.22.17
[1/4] Resolving packages…
[2/4] Fetching packages…
[3/4] Linking dependencies…
warning " > sass-loader@8.0.2" has unmet peer dependency "webpack@^4.36.0 || ^5.0.0".
[4/4] Building fresh packages…
Done in 89.95s.
root@server:~/subc/sub-web# yarn serve
yarn run v1.22.17
$ vue-cli-service serve
INFO Starting development server…
98% after emitting CopyPlugin
...
这个时候,就可以访问了 http://23.94.198.166:8080
在构建发布前,需要修改默认的后端的地址 
1. 修改文件 /root/subc/sub-web/src/views/Subconverter.vue
找到 257行 backendOptions,替换后面的 http://127.0.0.1:25500/sub? 为我自己的sub后端地址 http://23.94.198.166:25500/sub?

2. 修改文件 /root/subc/sub-web/.env 中的后端地址
# API 后端
VUE_APP_SUBCONVERTER_DEFAULT_BACKEND = "http://23.94.198.166:2500"
-- 2022-1-23 增补的内容,不在视频中

首先停止调试程序,CTRL+C ,退出当前调试,然后执行下面的命令进行打包
root@server:~# yarn build

执行以下打包命令,在/root/subc/sub-web/下面会生成一个 dist 目录,这个目录即为网页的发布目录。
把这个目录下的文件全部拷贝到你之前发布网站的目录下,比如 /var/www/html/

root@server:~# cp -R /root/subc/sub-web/dist/* /var/www/html/

第五章 测试转换

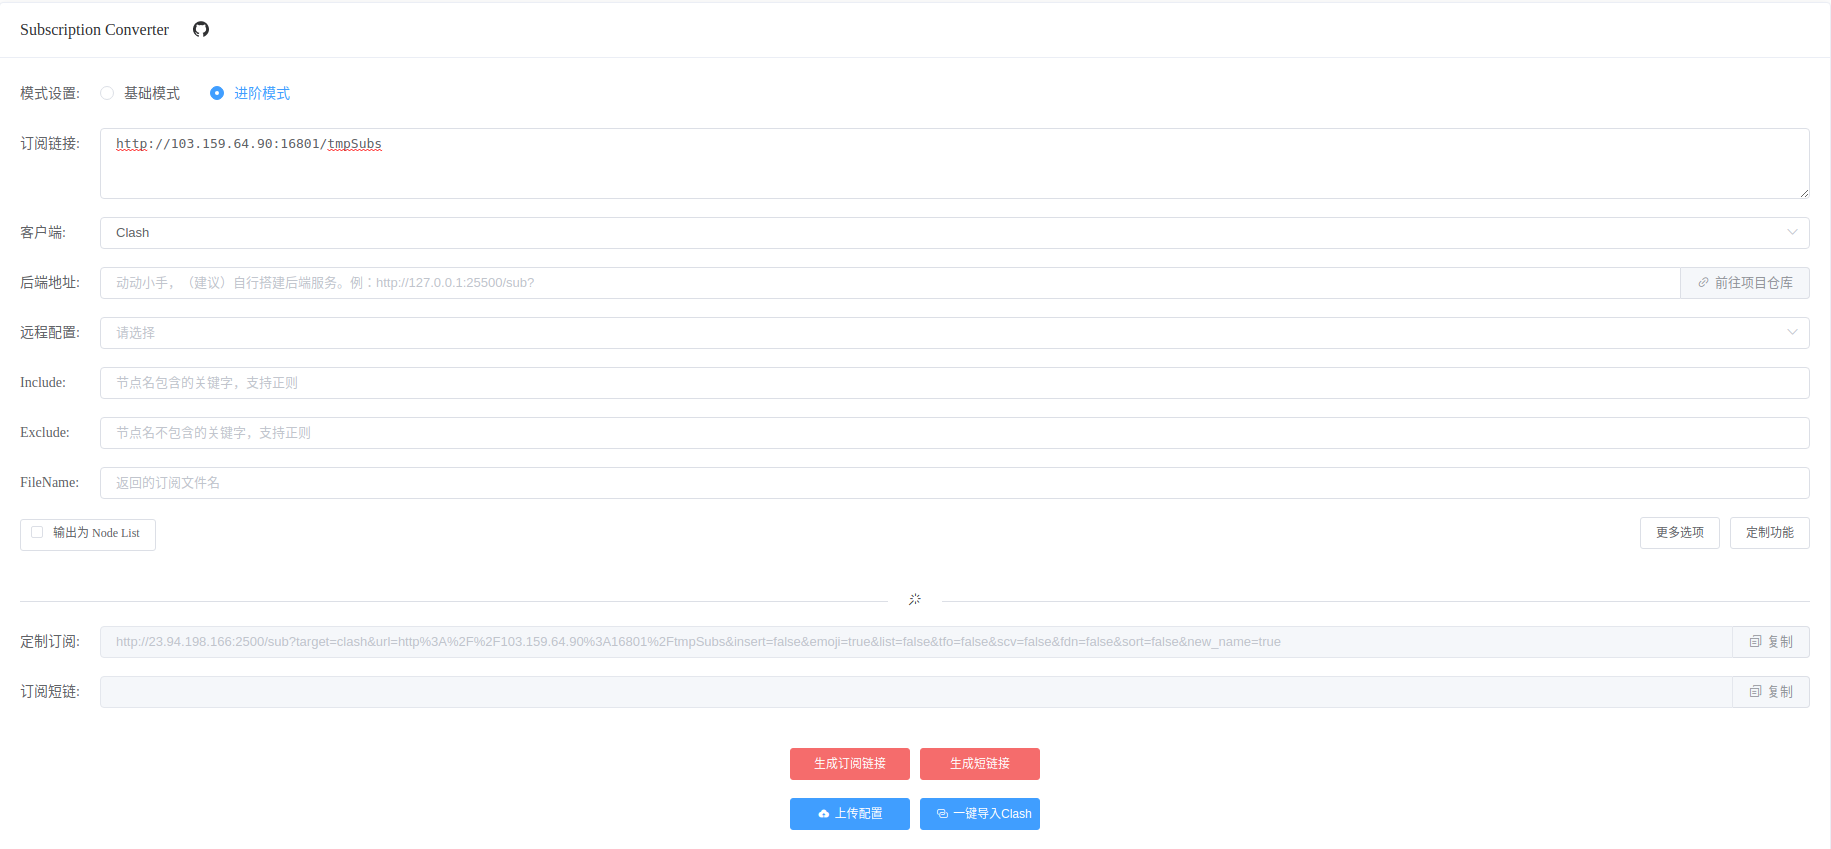
准备了一个订阅地址 http://103.159.64.90:16801/tmpSubs

在页面上,点击转换,输出到剪贴板的

http://127.0.0.1:25500/sub?target=clash&url=http%3A%2F%2F103.159.64.90%3A16801%2FtmpSubs&insert=false 

完成的样子

备注,收集资料过程中,多余的数据信息

如果服务器在国内
npm install -g cnpm --registry=https://registry.npm.taobao.org
cnpm install -g yarn

备忘录,pip3安装包时候的异常处理 2022-1-22

pip3安装包时候的异常处理

报错信息如下

# pip3 install psycopg2
Collecting psycopg2
  Downloading https://files.pythonhosted.org/packages/fd/ae/98cb7a0cbb1d748ee547b058b14604bd0e9bf285a8e0cc5d148f8a8a952e/psycopg2-2.8.6.tar.gz (383kB)
    100% |████████████████████████████████| 389kB 2.3MB/s 
Building wheels for collected packages: psycopg2
  Running setup.py bdist_wheel for psycopg2 ... error
  Complete output from command /usr/bin/python3 -u -c "import setuptools, tokenize;__file__='/tmp/pip-build-6opkdiqe/psycopg2/setup.py';f=getattr(tokenize, 'open', open)(__file__);code=f.read().replace('\r\n', '\n');f.close();exec(compile(code, __file__, 'exec'))" bdist_wheel -d /tmp/tmpcg0csrfqpip-wheel- --python-tag cp35:
  /usr/lib/python3.5/distutils/dist.py:261: UserWarning: Unknown distribution option: 'project_urls'
    warnings.warn(msg)
  running bdist_wheel
  running build
  running build_py
  creating build
  creating build/lib.linux-x86_64-3.5
  creating build/lib.linux-x86_64-3.5/psycopg2
  copying lib/_range.py -> build/lib.linux-x86_64-3.5/psycopg2
  copying lib/sql.py -> build/lib.linux-x86_64-3.5/psycopg2
  copying lib/_lru_cache.py -> build/lib.linux-x86_64-3.5/psycopg2
  copying lib/errorcodes.py -> build/lib.linux-x86_64-3.5/psycopg2
  copying lib/extensions.py -> build/lib.linux-x86_64-3.5/psycopg2
  copying lib/__init__.py -> build/lib.linux-x86_64-3.5/psycopg2
  copying lib/pool.py -> build/lib.linux-x86_64-3.5/psycopg2
  copying lib/_json.py -> build/lib.linux-x86_64-3.5/psycopg2
  copying lib/_ipaddress.py -> build/lib.linux-x86_64-3.5/psycopg2
  copying lib/extras.py -> build/lib.linux-x86_64-3.5/psycopg2
  copying lib/compat.py -> build/lib.linux-x86_64-3.5/psycopg2
  copying lib/tz.py -> build/lib.linux-x86_64-3.5/psycopg2
  copying lib/errors.py -> build/lib.linux-x86_64-3.5/psycopg2
  running build_ext
  building 'psycopg2._psycopg' extension
  creating build/temp.linux-x86_64-3.5
  creating build/temp.linux-x86_64-3.5/psycopg
  x86_64-linux-gnu-gcc -pthread -DNDEBUG -g -fwrapv -O2 -Wall -Wstrict-prototypes -g -fdebug-prefix-map=/build/python3.5-5Cvh2K/python3.5-3.5.3=. -fstack-protector-strong -Wformat -Werror=format-security -Wdate-time -D_FORTIFY_SOURCE=2 -fPIC -DPSYCOPG_VERSION=2.8.6 (dt dec pq3 ext lo64) -DPG_VERSION_NUM=140003 -DHAVE_LO64=1 -I/usr/include/python3.5m -I. -I/usr/include/postgresql -I/usr/include/postgresql/14/server -c psycopg/psycopgmodule.c -o build/temp.linux-x86_64-3.5/psycopg/psycopgmodule.o -Wdeclaration-after-statement
  In file included from psycopg/psycopgmodule.c:28:0:
  ./psycopg/psycopg.h:36:22: fatal error: libpq-fe.h: No such file or directory
   #include <libpq-fe.h>
                        ^
  compilation terminated.
  
  It appears you are missing some prerequisite to build the package from source.
  
  You may install a binary package by installing 'psycopg2-binary' from PyPI.
  If you want to install psycopg2 from source, please install the packages
  required for the build and try again.
  
  For further information please check the 'doc/src/install.rst' file (also at
  <https://www.psycopg.org/docs/install.html>).
  
  error: command 'x86_64-linux-gnu-gcc' failed with exit status 1
  
  ----------------------------------------
  Failed building wheel for psycopg2
  Running setup.py clean for psycopg2
Failed to build psycopg2
Installing collected packages: psycopg2
  Running setup.py install for psycopg2 ... error
    Complete output from command /usr/bin/python3 -u -c "import setuptools, tokenize;__file__='/tmp/pip-build-6opkdiqe/psycopg2/setup.py';f=getattr(tokenize, 'open', open)(__file__);code=f.read().replace('\r\n', '\n');f.close();exec(compile(code, __file__, 'exec'))" install --record /tmp/pip-ki8ms03h-record/install-record.txt --single-version-externally-managed --compile:
    /usr/lib/python3.5/distutils/dist.py:261: UserWarning: Unknown distribution option: 'project_urls'
      warnings.warn(msg)
    running install
    running build
    running build_py
    creating build
    creating build/lib.linux-x86_64-3.5
    creating build/lib.linux-x86_64-3.5/psycopg2
    copying lib/_range.py -> build/lib.linux-x86_64-3.5/psycopg2
    copying lib/sql.py -> build/lib.linux-x86_64-3.5/psycopg2
    copying lib/_lru_cache.py -> build/lib.linux-x86_64-3.5/psycopg2
    copying lib/errorcodes.py -> build/lib.linux-x86_64-3.5/psycopg2
    copying lib/extensions.py -> build/lib.linux-x86_64-3.5/psycopg2
    copying lib/__init__.py -> build/lib.linux-x86_64-3.5/psycopg2
    copying lib/pool.py -> build/lib.linux-x86_64-3.5/psycopg2
    copying lib/_json.py -> build/lib.linux-x86_64-3.5/psycopg2
    copying lib/_ipaddress.py -> build/lib.linux-x86_64-3.5/psycopg2
    copying lib/extras.py -> build/lib.linux-x86_64-3.5/psycopg2
    copying lib/compat.py -> build/lib.linux-x86_64-3.5/psycopg2
    copying lib/tz.py -> build/lib.linux-x86_64-3.5/psycopg2
    copying lib/errors.py -> build/lib.linux-x86_64-3.5/psycopg2
    running build_ext
    building 'psycopg2._psycopg' extension
    creating build/temp.linux-x86_64-3.5
    creating build/temp.linux-x86_64-3.5/psycopg
    x86_64-linux-gnu-gcc -pthread -DNDEBUG -g -fwrapv -O2 -Wall -Wstrict-prototypes -g -fdebug-prefix-map=/build/python3.5-5Cvh2K/python3.5-3.5.3=. -fstack-protector-strong -Wformat -Werror=format-security -Wdate-time -D_FORTIFY_SOURCE=2 -fPIC -DPSYCOPG_VERSION=2.8.6 (dt dec pq3 ext lo64) -DPG_VERSION_NUM=140003 -DHAVE_LO64=1 -I/usr/include/python3.5m -I. -I/usr/include/postgresql -I/usr/include/postgresql/14/server -c psycopg/psycopgmodule.c -o build/temp.linux-x86_64-3.5/psycopg/psycopgmodule.o -Wdeclaration-after-statement
    In file included from psycopg/psycopgmodule.c:28:0:
    ./psycopg/psycopg.h:36:22: fatal error: libpq-fe.h: No such file or directory
     #include <libpq-fe.h>
                          ^
    compilation terminated.
    
    It appears you are missing some prerequisite to build the package from source.
    
    You may install a binary package by installing 'psycopg2-binary' from PyPI.
    If you want to install psycopg2 from source, please install the packages
    required for the build and try again.
    
    For further information please check the 'doc/src/install.rst' file (also at
    <https://www.psycopg.org/docs/install.html>).
    
    error: command 'x86_64-linux-gnu-gcc' failed with exit status 1
    
    ----------------------------------------
Command "/usr/bin/python3 -u -c "import setuptools, tokenize;__file__='/tmp/pip-build-6opkdiqe/psycopg2/setup.py';f=getattr(tokenize, 'open', open)(__file__);code=f.read().replace('\r\n', '\n');f.close();exec(compile(code, __file__, 'exec'))" install --record /tmp/pip-ki8ms03h-record/install-record.txt --single-version-externally-managed --compile" failed with error code 1 in /tmp/pip-build-6opkdiqe/psycopg2/
      copying cffi/ffiplatform.py -> build/lib.linux-x86_64-3.7/cffi
      copying cffi/__init__.py -> build/lib.linux-x86_64-3.7/cffi
      copying cffi/model.py -> build/lib.linux-x86_64-3.7/cffi
      copying cffi/recompiler.py -> build/lib.linux-x86_64-3.7/cffi
      copying cffi/api.py -> build/lib.linux-x86_64-3.7/cffi
      copying cffi/_cffi_include.h -> build/lib.linux-x86_64-3.7/cffi
      copying cffi/parse_c_type.h -> build/lib.linux-x86_64-3.7/cffi
      copying cffi/_embedding.h -> build/lib.linux-x86_64-3.7/cffi
      copying cffi/_cffi_errors.h -> build/lib.linux-x86_64-3.7/cffi
      running build_ext
      building '_cffi_backend' extension
      creating build/temp.linux-x86_64-3.7
      creating build/temp.linux-x86_64-3.7/c
      x86_64-linux-gnu-gcc -pthread -DNDEBUG -g -fwrapv -O2 -Wall -g -fstack-protector-strong -Wformat -Werror=format-security -Wdate-time -D_FORTIFY_SOURCE=2 -fPIC -DUSE__THREAD -DHAVE_SYNC_SYNCHRONIZE -I/usr/include/ffi -I/usr/include/libffi -I/usr/include/python3.7m -c c/_cffi_backend.c -o build/temp.linux-x86_64-3.7/c/_cffi_backend.o
      [proxychains] DLL init: proxychains-ng 4.15
      [proxychains] DLL init: proxychains-ng 4.15
      c/_cffi_backend.c:15:10: fatal error: ffi.h: No such file or directory
       #include <ffi.h>
                ^~~~~~~
      compilation terminated.
      error: command 'x86_64-linux-gnu-gcc' failed with exit status 1
  
      ----------------------------------------
  Command "/usr/bin/python3 -u -c "import setuptools, tokenize;__file__='/tmp/pip-install-zzoehyo1/cffi/setup.py';f=getattr(tokenize, 'open', open)(__file__);code=f.read().replace('\r\n', '\n');f.close();exec(compile(code, __file__, 'exec'))" install --record /tmp/pip-record-bowz6rjy/install-record.txt --single-version-externally-managed --prefix /tmp/pip-build-env-31eykgev --compile" failed with error code 1 in /tmp/pip-install-zzoehyo1/cffi/
  
  ----------------------------------------
Command "/usr/bin/python3 -m pip install --ignore-installed --no-user --prefix /tmp/pip-build-env-31eykgev --no-warn-script-location --no-binary :none: --only-binary :none: -i https://pypi.org/simple -- setuptools>=40.8.0 wheel "cffi>=1.4.1; python_implementation != 'PyPy'"" failed with error code 1 in None

处理办法:

apt-get install build-essential
apt-get install python3-setuptools
apt-get install python3-dev
apt-get install python3-cffi
apt-get install libpq-dev

pip3 install --upgrade pip


Donate
云乞讨

基于MAC地址的白名单,使用iptables过滤MAC地址的问题 2022-1-19

有一个需求,在OpenVPN组网的时候,考虑MAC地址的白名单,根据OSI网络模型,应用层的代理,肯定看不到客户端设备的MAC地址,自然谈不上过滤。

不过OpenVPN应该是可以的,它是数据链路二层的。

参考了网络上的教程,基本上,可以基于iptables过滤网络内的一部分流量。为了方便大家理解,我这里贴一个iptables的工作逻辑原理图

理论上,必须经过我们的网卡的,才可以进行过滤

通常,在

  1. PREROUTING
  2. FORWARD
  3. INPUT

整理的资料信息:

例子01,限制INPUT,来源MAC地址 00:0F:EA:91:04:08,丢弃
/sbin/iptables -A INPUT -m mac --mac-source 00:0F:EA:91:04:08 -j DROP


例子02,限制INPUT,目的端口22,来源MAC地址 00:0F:EA:91:04:07,允许
/sbin/iptables -A INPUT -p tcp --destination-port 22 -m mac --mac-source 00:0F:EA:91:04:07 -j ACCEPT

例子03,限制INPUT,网卡为eth1,目的端口22,来源MAC地址为 00:0F:EA:91:04:07,允许
/sbin/iptables -A INPUT -i eth1 -p tcp --destination-port 22 -m mac --mac-source 00:0F:EA:91:04:07 -j ACCEPT

在FORWARD或者PREROUTING里面也同样的道理
/sbin/iptables -A FORWARD -i ethX -m mac --mac-source YOUR-MAC-ADDRESS-HERE -j ACCEPT

/sbin/iptables -A FORWARD -m state --state NEW -m mac --mac-source YOUR-MAC-ADDRESS-HERE -j ACCEPT


/sbin/iptables -A INPUT -p tcp --dport 22 -m mac ! --mac-source MAC-ADDRESS-HERE-TO-SKIP -j DROP
### Drop ssh access to all except our own MAC Address ###
/sbin/iptables -A INPUT -p tcp --dport 22 -m mac ! --mac-source YOUR-MAC-ADDRESS-HERE -j DROP
### Save rules ###
/sbin/service iptables save


可以使用IP/MAC同时匹配
iptables -A INPUT -p tcp -s 192.168.1.200 -m mac --mac-source 00:0F:EA:91:04:08 -j DROP

限制登录的白名单MAC地址
/sbin/iptables -A INPUT -p tcp --dport 22 -m mac ! --mac-source YOUR-MAC-ADDRESS-HERE -j DROP

在转发链的限制
iptables -A FORWARD -i eth0 -o eth1 -m mac --mac-source 00:0F:EA:91:04:07 -j ACCEPT


允许
iptables -I INPUT -p tcp --dport 22 -m mac --mac-source 3E:D7:88:A6:66:8E -j ACCEPT


拒绝
iptables -I INPUT -p tcp --dport 22 -m mac --mac-source 3E:D7:88:A6:66:8E -j REJECT


拒绝所有的,放行3E:D7:88:A6:66:8E
iptables -I INPUT -p tcp --port 22 -m mac ! --mac-source 3E:D7:88:A6:66:8E -j REJECT


一般的OpenVPN的规则
iptables -I FORWARD -m state --state RELATED,ESTABLISHED -j ACCEPT
iptables -I FORWARD -s 10.8.0.0/24 -j ACCEPT
iptables -I INPUT -p udp --dport 1194 -j ACCEPT
iptables -t nat -A POSTROUTING -s 10.8.0.0/24 ! -d 10.8.0.0/24 -j SNAT --to 104.237.156.154

REJECT动作会返回一个拒绝(终止)数据包(TCP FIN或UDP-ICMP-PORT-UNREACHABLE),明确的拒绝对方的连接动作,连接马上断开

DROP动作只是简单的直接丢弃数据,并不反馈任何回应。需要Client等待超时

参考 https://www.cyberciti.biz/tips/iptables-mac-address-filtering.html

配置OpenVPN组网的技术实践 2022-1-19

OpenVPN,是一个比较久远的开源VPN组网的方式了,也经过了这么多年的实践检验,对于绝大部分国人来说,用来过墙,这个技术是不合适的,如果是过墙需求,请忽略本文章。

纯国内的网络环境,基于OpenVPN跨地域的组网是非常合适而且可靠的,虽然,通常意义上,现在更推荐使用Wireguard的组网方式。

场景需求描述

客户办公环境下,有一个小型的局域网环境,有多台设备,需要公网可以访问内部资源,同时,由于其走的5G的CPE路由器进入的,需要将内网的设备进行隔离。

已经接近完工,待总结

开源下载工具,Hitomi-Downloader开箱介绍 2022-01-17

需求,替代迅雷的windows桌面端下载工具

项目地址 https://github.com/KurtBestor/Hitomi-Downloader

基本上Youtube-DL支持的网站,它都是支持的,b站,Youtube,Pornhub等等。

此外,它还支持磁力下载,BT种子下载。

一般的视频站点,下载方式很简单,复制需要下载的视频的网址,贴到它的内容框里,点击下载图标即可。

如果是某些海外的站,请自备一个可达的本地环境。

视频下载很快,转码速度很慢,估计用的CPU转码的,我显卡资源没有用上。

本篇对应的博客地址  https://dasmz.com/?p=1243
本篇对应的Youtube视频地址  https://youtu.be/JLZxW2nbxOY
Donate
云乞讨

玩转订阅地址转换神器 subconverter,含部分进阶参数设置 2022-1-11

更新记录 
+ 2022-01-11 编辑文章
+ 2023-11-22 更新文章,增加对于URL-TEST参数URL的修改,章节七

需求描述

在本篇文章中,会教会大家配置一个自己的subconverter,订阅地址转换,用自己配置的,也就不用担心自己购买的梯子被无良的人窃取使用了。

时间线

2022-1-11 完成基础配置,基础的订阅转换的讲解,视频地址,

2022-1-15 完成更新,如何自己使用项目源码,进行Linux x86_64平台的编译。

项目地址 https://github.com/tindy2013/subconverter

本篇文章发布的时候是2022-1-11,当前最新的release发布版本是0.7.1

https://github.com/tindy2013/subconverter/releases/tag/v0.7.1

第一章、基础配置,及订阅转换的讲解

// 获取对应平台版本的压缩包,我这里环境是linux x64的,就下载对应版本,不必root用户


user@server:~$ mkdir ./subc
user@server:~$ cd subc
user@server:~$ wget https://github.com/tindy2013/subconverter/releases/download/v0.7.1/subconverter_linux64.tar.gz
user@server:~$ tar -zxvf subconverter_linux64.tar.gz
user@server:~$ cd subconverter
// 常驻后台,启动服务
user@server:~$ nohup ./subconverter &
user@server:~$ ss -tnl | grep 25500
// 能看到25500的端口监听就对了
user@server:~$ 
// 服务器上,这个正常进程在,就可以了
// 通用的API接口参数格式
http://127.0.0.1:25500/sub?target=%TARGET%&url=%URL%&config=%CONFIG%


// 刚刚的服务端启动好了后,假设102.199.166.159为刚刚搭建subconverter的服务器公网地址,那么,普通地址转换为其他客户端地址,典型示例样例如下
http://102.199.166.159:25500/sub?target=clash&url=机场普通订阅地址的URLEncode后的字符串
http://102.199.166.159:25500/sub?target=surge&ver=4&url=机场普通订阅地址的URLEncode后的字符串

将上面的对应的,添加到对应客户端即可!!

第二章,修改subconverter的监听端口

修改程序目录下的 pref.toml
如果需要修改为本地监听,修改listen,从'0.0.0.0'到'127.0.0.1',设置为本地的目的,主要是方便后续用Nginx之类的给它套HTTPS,连接更安全,你们可以不修改这个。
如果需要修改监听端口,修改port,从25500到你想要设置的端口(端口需要未被占用的)
[server]
listen = "127.0.0.1"  
port = 6419
serve_file_root = "web"预留位置,后面讲解

第三章,适配Clash新的内核

在2022-01-02附近,Dreamacro发布的新版的Clash内核,v1.9.0

https://github.com/Dreamacro/clash/releases

新版clash v1.9.0内核的配置文件,格式已有变化,之前全部版本的配置文件,在新版内核的各平台客户端上,已无法正常使用线路。我们也无法直接用subconverter v0.7.1版本进行直接订阅地址转换的适配

使用subconverter适配 clash v1.9.0内核的过程

https://github.com/tindy2013/subconverter/issues/442

查看修改更新的内容:

https://github.com/tindy2013/subconverter/commit/6e3324be50ecd6d7484c38722db572ff288415ef

获取新版clash v1.9.0内核的适配 6e3324be50ecd6d7484c38722db572ff288415ef

https://github.com/tindy2013/subconverter/actions

通过观察作者的修改,其实只需要替换一个文件 src/generator/config/subexport.cpp

https://github.com/tindy2013/subconverter/blob/master/src/generator/config/subexport.cpp

  1. 可直接从action里下载编译好的版本 by zhongfly
    相关链接:https://github.com/tindy2013/subconverter/actions/workflows/build.yml
  2. 可选用原作者提供的docker项目
  3. 可选自己根据项目源码进行编译

2022-1-15 更新:作者已经将这个改进合并到主线,故而,直接自己下载该项目的全部源码,整体编译一下即可。

自己编译生成对应平台的subconverter程序

# 执行编译的过程,系统OS推荐: Debian 10 / Ubuntu 20.04
# 自己的海外VPS上面编译,可以减少异常
# 我的VPS只有1核心1GB内存,故而,略微修改了编译脚本

apt-get update
apt-get install git
mkdir -p /root/src
cd /root/src
git clone https://github.com/tindy2013/subconverter.git
sed -i 's/j4/j1/g' /root/src/subconverter/scripts/build.alpine.release.sh
sed -i 's/j2/j1/g' /root/src/subconverter/scripts/build.alpine.release.sh
docker pull multiarch/alpine:amd64-latest-stable
docker run -v /root/src/subconverter:/root/workdir multiarch/alpine:amd64-latest-stable /bin/sh -c "apk add bash git nodejs npm && cd /root/workdir && chmod +x scripts/build.alpine.release.sh && bash scripts/build.alpine.release.sh"

完成编译后,会在该目录下,生成subconverter的目录,打包传输到需要运行subconverter的服务器,运行即可!!!

实在懒的动手的,就等原作者下次正式版本的release更新吧。

第四章,适配TikTok的规则

修改程序目录下的 rules/DivineEngine/Surge/Ruleset/StreamingMedia/Streaming.list
修改TikTok段落就对应的规则可以,如果是其他流媒体,也是类似的操作。
# > TikTok
USER-AGENT,TikTok*
DOMAIN-SUFFIX,akamaized.net
DOMAIN-SUFFIX,app-measurement.com
DOMAIN-SUFFIX,appsflyer.com
DOMAIN-SUFFIX,byteoversea.com
DOMAIN-SUFFIX,googleapis.com
DOMAIN-SUFFIX,ibytedtos.com
DOMAIN-SUFFIX,ibyteimg.com
DOMAIN-SUFFIX,ipstatp.com
DOMAIN-SUFFIX,muscdn.com
DOMAIN-SUFFIX,musical.ly
DOMAIN-SUFFIX,snapkit.com
DOMAIN-SUFFIX,tik-tokapi.com
DOMAIN-SUFFIX,tiktokcdn.com
DOMAIN-SUFFIX,tiktokcdn-us.com
DOMAIN-SUFFIX,tiktok.com
DOMAIN-SUFFIX,tiktokv.com
DOMAIN-KEYWORD,-tiktokcdn-com

第五章,WEB前端搭配

见地址 https://dasmz.com/?p=1289

第六章,增加对steam规则的适配 2022-02-18

修改 rules/DivineEngine/Surge/Ruleset/China.list

删除
# > Steam
DOMAIN-SUFFIX,steamcontent.com
DOMAIN-SUFFIX,steampowered.com
DOMAIN-SUFFIX,steamstatic.com


修改 rules/DivineEngine/Surge/Ruleset/StreamingMedia/Streaming.list

增加
# > Steam
DOMAIN-SUFFIX,steamcontent.com
DOMAIN-SUFFIX,steampowered.com
DOMAIN-SUFFIX,steamstatic.com

章节七,增加对URL-TEST参数的修改

近日发现猫咪的URL-TEST不工作了,排查发现,是 http://www.gstatic.com/generate_204 有点问题,如果是这样,那就好办了,无非就是不用谷歌的这个地址呗,直接从外面找一个 http://xx.xx.xx.xx/ 这样的IP:80类似格式,可以通的HTTP/WEB地址,修改到配置文件即可

修改配置文件 ./snippets/groups.toml

< url = "http://23.xx.xx.18/"
---
> url = "http://www.gstatic.com/generate_204"

修改完配置文件,直接重启一下subconverter即可。

= = = = = = 分割线 = = = = = =

v-000059
v-000060

配置树莓派2 Raspberry 2 Model B V1.1 2014从USB boot startup的SSD固态硬盘启动 2022-1-9

第一章 需求描述

如文章标题所示的,需要配置树莓派Raspberry从USB的SSD固态硬盘启动,将保证它运行的性能,同时又能获取较大的容量

第二章 硬件清单

01 树莓派2 Raspberry 2 Model B V1.1 2014版

02 USB电源插头,规格为5V-1A,配套的USB线

03 固态硬盘一个,容量为120GB的SSD固态硬盘,及配套的硬盘盒,USB连接线

04 microSD存储卡,及配套的USB读卡器

05 显示器,及有HDMI接口的显示器连接线/转接线(用于调试)

第三章 安装实施

3-01 状况描述

默认情况下,Raspberry Pi 从 microSD 存储卡启动。但是自从 Raspberry Pi 3 发布以来,新的 Pi 也能够从 USB 大容量存储设备启动。

新的启动模式处于试验阶段,因此它可能不适用于您的 U 盘或硬盘,就是说有些硬盘可能未必兼容。

设置启动模式是永久性的。实际如果插入了 microSD 卡,您的 Pi 仍会优先从 microSD 存储卡启动。

看到这里,我就无语了,我吃灰的树莓派,版本是(Raspberry 2 Model B V1.1 2014),好像版本有点旧了。网络上的文章大多是基于pi3 或者pi 4的,因为我有这样的旧设备,本篇文章正好再来尝试一下旧设备的安装方式。

原理也很简单,写入一个镜像到microSD存储卡,写入一个镜像到120GB的SSD固态硬盘,在 microSD卡的/boot/cmdline.txt中指向启动的分区为120G固态硬盘上的文件系统,就可以了

3-02 尝试安装

本次操作是在上次已经写入镜像的基础上进行操作的,写入树莓派镜像到microSD存储卡的教程在 https://dasmz.com/?p=1045

格式化存储卡,写入镜像,在该/boot中,创建SSH空白文件的操作不要忘记

格式化120G的固态硬盘,写入镜像,写完之后,再插入一下台式机,格式化掉它的/boot这个卷

把树莓派插上供电,连接网线,通过路由器的管理页面,找到它的IP地址

通过终端连接树莓派,最好有显示器接在树莓派上,可以看到树莓派的启动状态

user@local:~ $ ssh pi@10.11.11.114
// 密码为初始的 raspberry

3-03 指定启动的文件系统

设备的系统本质上是2个分区,一个是/root 一个是常规的文件系统/

pi@raspberrypi:~ $ blkid

/dev/mmcblk0p1: LABEL_FATBOOT="boot" LABEL="boot" UUID="C839-E506" BLOCK_SIZE="512" TYPE="vfat" PARTUUID="3f7dd594-01"

/dev/mmcblk0p2: LABEL="rootfs" UUID="568caafd-bab1-46cb-921b-cd257b61f505" BLOCK_SIZE="4096" TYPE="ext4" PARTUUID="3f7dd594-02"

/dev/sda1: LABEL_FATBOOT="NBOOT" LABEL="NBOOT" UUID="E2A7-DCF9" BLOCK_SIZE="512" TYPE="vfat" PARTUUID="8acef004-01"

/dev/sda2: LABEL="rootfs" UUID="568caafd-bab1-46cb-921b-cd257b61f505" BLOCK_SIZE="4096" TYPE="ext4" PARTUUID="8acef004-02"

pi@raspberrypi:~ $ 

// 16GB存储卡 
// Disk /dev/mmcblk0: 15 GiB, 16110321664 bytes, 31465472 sectors

// 120GB的SSD固态硬盘
// Disk /dev/sda: 111.79 GiB, 120034123776 bytes, 234441648 sectors

看到如上的信息之后,记录下来,把树莓派关机,把存储卡拔出来,插进存储卡读卡器,插上电脑,在/boot/cmdline.txt中指向启动的分区为120G固态硬盘上的文件系统,应该就可以了。

root@raspberrypi:/boot# vi cmdline.txt
console=serial0,115200 console=tty1 root=PARTUUID=8acef004-02 rootfstype=ext4 fsck.repair=yes rootwait
root@raspberrypi:/boot# reboot


// 修改PARTUUID的3f7dd594-02到我们120GB固态硬盘的那个8acef004-02
// 可选用UUID,root=LABEL=FuDatui或者root=UUID=CB99-9527

修改完成,直接重启,重启后,登录系统,在扩展一下磁盘到SSD的整个分区,再重启

root@raspberrypi:~# raspi-config
-- 选择 advanced option
-- 选择 Expand Filesystem ...
root@raspberrypi:~# reboot

3-04 更新

切换到root用户后,执行更新操作,这两个的更新,纯国内网络环境,可能需要比较久的时间,如果有条件的,尽量让 raspberrypi.org 这个相关的域名,走到代理去。

root@raspberrypi:~# apt-get update
root@raspberrypi:~# apt-get upgrade

执行过程的截图,不走代理,和走代理更新的速度巨大差别。配置apt走代理的教程 https://dasmz.com/?p=19

因为是microSD存储卡,升级upgrade的操作时间比较久,一共用了4分45秒

3-05 补缺

执行过程提示了,两个报错,故而建议把语言和时区设置一下

root@raspberrypi:/home/pi# dpkg-reconfigure locales
// 增加勾选 en_US.UTF-8 zh_CN.UTF-8这两个,因为树莓派Raspberry是英国出品,所以,默认语言是en_GB

设置服务器的时区,设置为亚洲/上海

root@raspberrypi:/home/pi# dpkg-reconfigure tzdata

Current default time zone: 'Asia/Shanghai'
Local time is now:      Sun 09 Jan 2022 08:44:02 PM CST.
Universal Time is now:  Sun Jan  9 12:44:02 UTC 2022.

debconf: DbDriver "templatedb": could not sync /var/cache/debconf/templates.dat-new: Input/output error
root@raspberrypi:/home/pi# 

如果觉得这篇文章很赞,欢迎赞赏/打赏

Donate
云乞讨

参考文章 https://forums.raspberrypi.com/viewtopic.php?t=193157

参考文章 https://thepi.io/how-to-boot-your-raspberry-pi-from-a-usb-mass-storage-device/

参考文章 http://www.maoyingdong.com/raspberry_4b_usb_boot/

参考文章 https://www.cnblogs.com/sjqlwy/p/4495917.html 基本无用

参考文章 https://blog.51cto.com/u_15162069/2782366 基本无用

VMess MD5 认证信息 淘汰机制 2022-1-6

问题描述:

好几个小伙伴向我反馈,其用一键脚本搭建的V2ray梯子,最近”不好用了”。

大概率的影响因素,就是如本文标题所说的vmess md5认证信息,淘汰机制的影响。

官方的链接说明: https://www.v2fly.org/config/protocols/vmess.html

自 2022 年 1 月 1 日起,服务器端将默认禁用对于 MD5 认证信息 的兼容。

换成大白话就是,在2022-1-1开始,服务端的V2ray会默认自动拒绝旧版的Header,造成客户端发送的连接请求,在服务端进程上被拒绝连接。

常见的报错信息如下:

2022/01/02 16:26:41 127.0.0.1:57634 rejected common/drain: common/drain: unable to drain connection > websocket: close 1000 (normal) > proxy/vmess/encoding: invalid user: VMessAEAD is enforced and a non VMessAEAD connection is received. You can still disable this security feature with environment variable v2ray.vmess.aead.forced = false . You will not be able to enable legacy header workaround in the future.

// 当 alertID >0 时,VMess 出站仍将使用 VMess MD5

// 影响的版本范围 4.35.0

因为,不同平台,不同的客户端,开发者适配工作暂时未完成,且为了兼容很多不懂升级客户端的人,暂时应优先考虑将V2RAY_VMESS_AEAD_FORCED在环境变量中关闭的方式。

处理的办法1

修改systemd服务

修改 /etc/systemd/system/v2ray.service

增加一行内容

Environment="V2RAY_VMESS_AEAD_FORCED=false"

增加完,重启服务即可

systemctl daemon-reload

systemctl restart v2ray

处理办法2

修改systemd服务

修改 /etc/systemd/system/v2ray.service

ExecStart=/usr/bin/env v2ray.vmess.aead.forced=false /usr/bin/v2ray/v2ray -config /etc/v2ray/config.json

增加完,重启服务即可

systemctl daemon-reload

systemctl restart v2ray

处理办法3

下载旧版本(低于4.35.0)的对应平台的release二进制文件压缩包,解压覆盖到/usr/bin/v2ray/目录

附录1:

# 如果是Docker,修改 docker-compose.yml
environment:
        - 'config/etc/v2ray/config.json'
        - 'V2RAY_VMESS_AEAD_FORCED=false'
Donate
云乞讨

树莓派Raspberry 写入镜像 2022-1-4

需求:手头有一个上古时期的树莓派,型号是B V1.1 2014,可以给它写入一个镜像,用来当作下载机。

一、下载Win32 Disk Imager

https://sourceforge.net/projects/win32diskimager/

二、下载树莓派Raspberry的镜像文件

https://www.raspberrypi.com/software/operating-systems/

三、安装Win32 Disk Imager

四、格式化U盘

五、解压镜像文件,用Win32 Disk Imager写入镜像到TF存储卡

六、在boot分区下,写入一个空白的名称为SSH文件

七、TF存储卡插入树莓派,接上网线,接上电源

Donate
云乞讨