root@ZabbixProxy:~# mysql -uroot -p
这里输入是数据库root用户的密码
MariaDB> create database zabbix character set utf8 collate utf8_bin;
MariaDB> create user zabbix@localhost identified by '这里是zabbix用户的密码';
MariaDB> grant all privileges on zabbix.* to zabbix@localhost;
MariaDB> flush privileges;
MariaDB> quit;
ERROR 1118 (42000) at line 1278: Row size too large (> 8126).
Changing some columns to TEXT or BLOB may help.
In current row format, BLOB prefix of 0 bytes is stored inline.
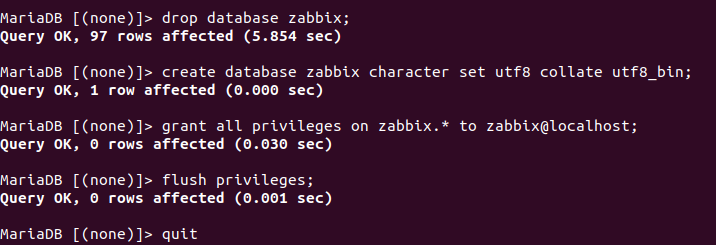
root@ZabbixProxy:~# mysql -uroot -p
这里输入是数据库root用户的密码
MariaDB> drop database zabbix;
MariaDB> create database zabbix character set utf8 collate utf8_bin;
MariaDB> grant all privileges on zabbix.* to zabbix@localhost;
MariaDB> flush privileges;
MariaDB> quit;
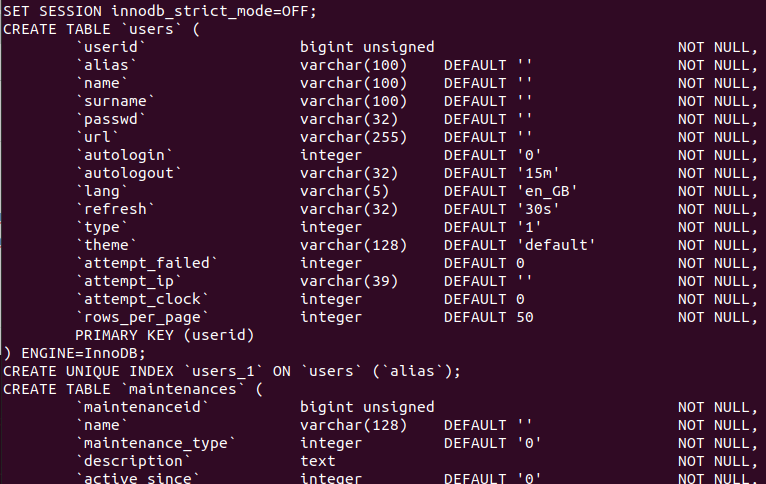
修改数据库的SQL文件
root@ZabbixProxy:~# cd /usr/share/doc/zabbix-proxy-mysql
root@ZabbixProxy:~# gzip -d schema.sql.gz
root@ZabbixProxy:~# vi schema.sql
新增一行到文件开头 SET SESSION innodb_strict_mode=OFF;
root@ZabbixProxy:~# cat schema.sql | mysql -uzabbix -p zabbix
// 这里输入的是,数据库用户zabbix的密码